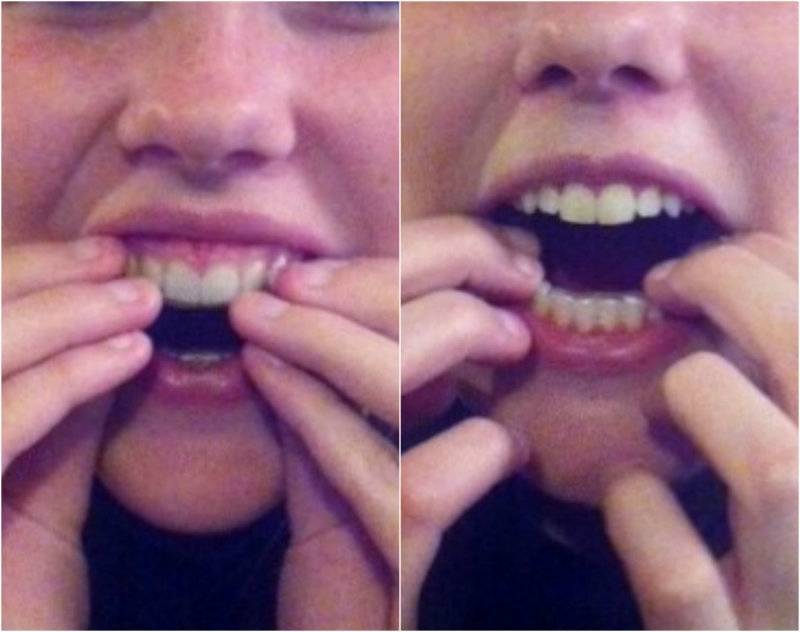
Let me start by saying I was definitely skeptical. I expected to see no results but figured I’d give it DIY teeth whitening a try. I tried other DIY teeth whitening products in the past, such as strips, pastes and gels. I was never able to see a noticeable difference after using these products. After about a week or two with those products, the process became so frustrating that I usually gave up, wasting both my time and money. The photos below show the change in my teeth. When I see before and after photos for products, I always wonder if they’ve been altered or filtered in any way. I can assure you that my photos are originals (that explains the amateur quality!) and not altered to show greater results.
I tried to take my pictures in the same lighting at the same time each day. I simply used my iPhone and took some “teeth selfies” to show you how my smile improved with Smile Brilliant.
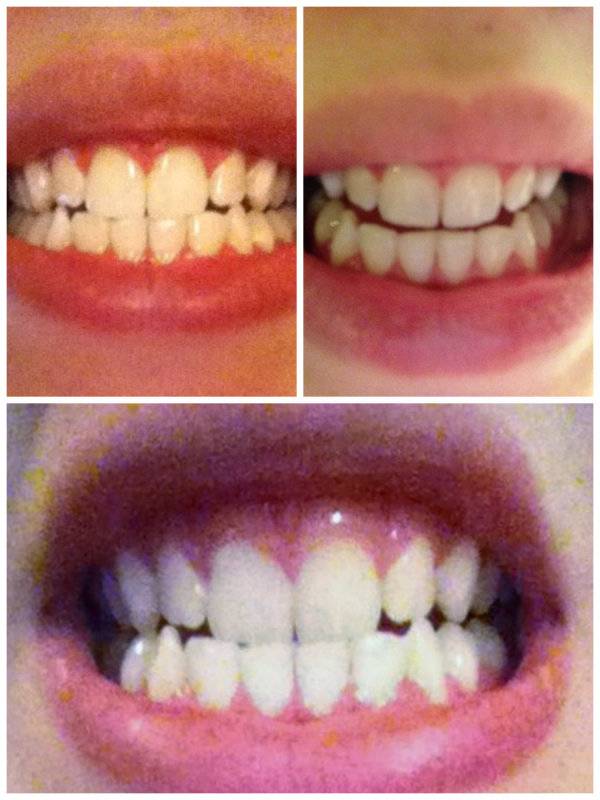
DIY Teeth Whitening with Smile Brilliant [The Process in Details]
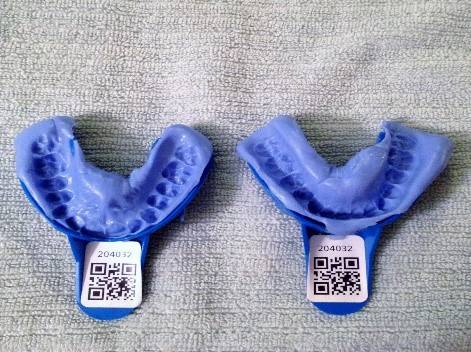
You might want to to begin your teeth whitening experience you first need to have your personal teeth whitening trays created. To do this, you create molds of your upper and lower teeth in the impression trays using the catalyst and base pastes. The trays and pastes look like this:
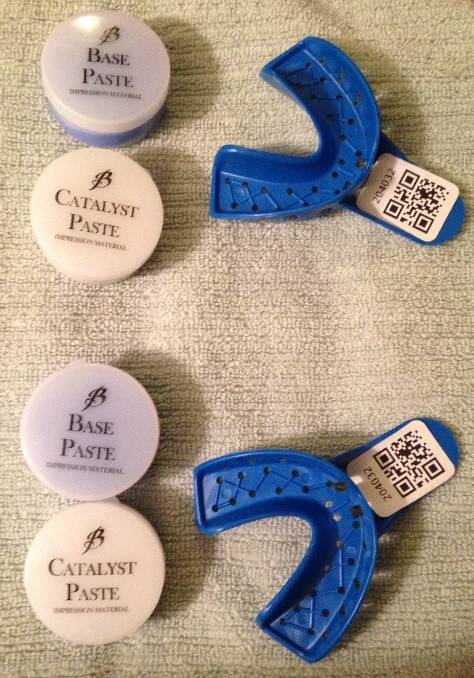
Each impression tray has a number marked on them that matches to the number on your return card. This number helps ensure that your trays are matched to your name. It’s a security measure to help ensure no mix-ups. Therefore, it is critical that you return both the trays and the cards together in the postage paid envelope.
You are provided with an extra set of catalyst and base pastes in case you make a mistake and need to mix another batch. If they aren’t needed, simply discard the extras after trays are successfully created.
Before beginning the Smile Brilliant whitening process, make sure you have read the instructions carefully. Have all materials needed handy. This includes the entire kit, instructions, paper towels, glass of water, and a method to time mixing pastes and creating impressions. I used the timer on my cell phone and had a friend help set and monitor the time. There are specific time limits for the steps in creating the impressions so being organized and prepared is important.
Impression Tray Creation
Step 1: Brush and Floss Before making your impressions, make sure your teeth are clean. This will help make the best impression of your own teeth for your whitening trays. Brush and floss immediately before beginning the process.
Step 2: Prepare Impression Material Wash and dry hands thoroughly before beginning. Work with only one set of pastes and trays at a time. Don’t attempt to mix them all together or make impressions of both upper and lower teeth at the same time. Timing and accuracy is critical.
Remove one of each of the catalyst (white) and base (blue) pastes from their containers. Begin to mix the two pastes together by folding and squeezing the pastes together. Continue folding and squeezing for exactly 1 minute. When you have completely mixed the white and blue pastes together the result will be a uniformly blue color.
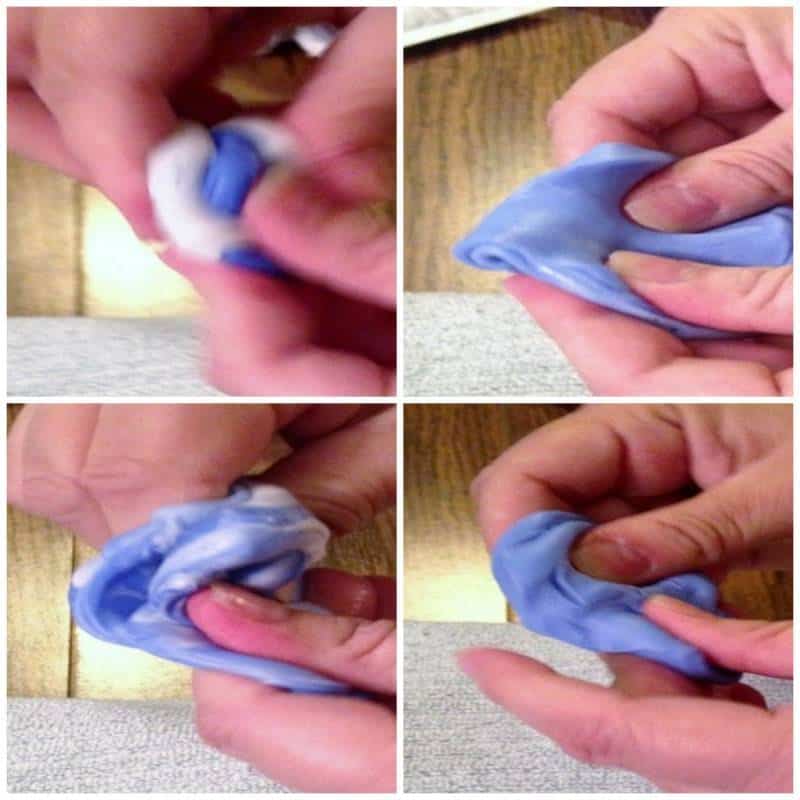 Step 3: Placing Putty Mixture in Impression Trays After exactly 1 minute of folding, press putty mixture into plastic impression tray. Spread it quickly and evenly throughout the tray. This should take no longer than 45 seconds. As soon as the putty is spread properly in the tray, immediately go to Step 4.
Step 4: Make Impressions of Teeth This is the most important step to follow to make sure you have accurate impressions of your teeth. Follow all tips exactly:
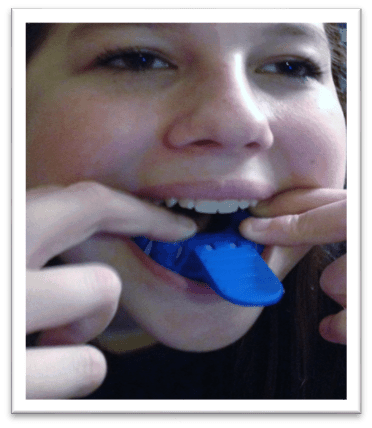
- Do top tray first.
- Looking at the tray, visualize a line running down the middle. That is where your teeth need to “bite”.
- Hold the impression tray with both hands. Place fingers along all points of the bottom of the tray.
- Open mouth widely.
- With fingertips, press trays evenly and firmly upward into your teeth. It will feel squishy and have a slightly minty taste. You may have excess saliva.
- Press the trays into the teeth surface enough that the paste will overlap onto the gum line in the front and rear.
- Massage the overflow paste into gums. Do not wipe away or remove.
- Allow trays to remain on teeth for exactly 2 minutes to harden.
- Don’t bite the impressions/trays.
- Don’t wiggle the trays around.
- Don’t remove early. Trays needs to stay on teeth for exactly 2 minutes.
Step 5: Check Impression Quality and Repeat with Lower Teeth
When you remove the tray from your mouth, the putty should be somewhat hardened. You should be able to clearly see the individual impressions of your teeth in the putty. If the individual teeth impressions are not clear, pull the hardened putty from the tray and repeat using the extra set of pastes. Do not remove final putty impressions from the trays unless you are redoing to correct an error! Trays with final putty impressions are mailed intact.
Allow impressions to sit for another 10 minutes to finish hardening. Rinse with cool water. Repeat steps 2-5 with the second set of pastes and take impression of lower teeth.
Step 6: Mailing Impressions and Receiving Whitening Trays
Place both upper and lower impression trays in the Smile Brilliant postage paid envelope. Sign and date the consent card. Make a copy (so you have your tray number). Place card in return envelope with trays. If you fail to return the card it will delay your processing. Finally, remember to write your return address on the envelope in case of problems with postal service. I failed to do this and my impressions were lost in the mail and had to be redone.
Trays take approximately 3-4 business days to arrive at processing center. The personalized whitening trays are shipped back to you typically within 5 days of arrival at the company. If there is an exceptional delay, call 855-944-8361 or e-mail to [email protected]. Be prepared to give them your product number and name.
After processing, your personal, clear whitening trays will come in the mail enclosed in a case for protection and future storage. You are ready to begin your whitening treatments!
Teeth Whitening Process
Once your whitening trays arrive you’ll be excited to begin. But, slow down! For the first treatment, make sure you allow yourself the time to learn the steps and know what the experience involves.
Take a few minutes and read the enclosed information for desensitizing and whitening. In addition to the directions, be sure to read the product disclosure information that includes storage and cautions for the products.
When you are ready, make sure you have all materials ready. Because you may have extra saliva and overflow of gels, you may want to have a towel or paper towel nearby.
Your kit comes with tubes of desensitizing gel and whitening gel. If you have sensitive teeth, the desensitizing gel can help prevent pain and tenderness associated with the whitening treatment. You may or may not need to use this gel. It does not impact the actual whitening process. Since the desensitizing does not impact the whitening, the process is not covered here. I did not find it was helpful to the sensitivity I felt in my gums (rather than teeth).
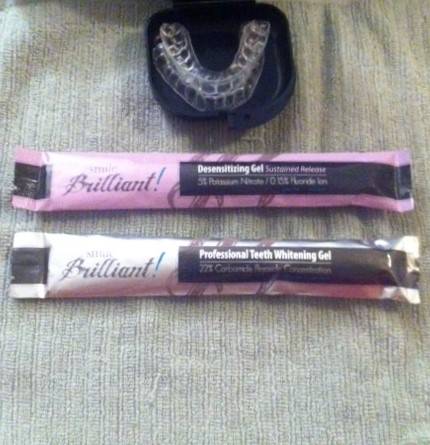
Step 1: Prepare for Whitening Before beginning your whitening treatment, brush and floss your teeth thoroughly (see note below about flossing for sensitive gums). Have a small hand-towel ready to wipe away any excess gel that may ooze from the trays onto your gums. While swallowing small amounts of the gel is unlikely to cause harm, you can spit excess saliva and gel into towel. Make sure to use a towel that will not be affected by the whitening agents. Because of the whitening chemicals, the gel fizzes and bubbles from the trays once it is placed on your teeth. Once the gel comes in contact with your teeth and gums, you may feel some sensitivity. If you have sensitive teeth, using the desensitizing gel may help. If you have sensitive gums, do not floss immediately before whitening to lessen the sensitivity. I have sensitive gums. The first time I used the whitening gel, I flossed immediately beforehand as recommended. The burning was instant. On a scale of 1 to 10, it was a 10! And, the pain continued into the next day. It interfered with my ability to eat and drink comfortably. So, on subsequent whitening treatments, I did not floss beforehand and the burning was not as strong and did not last as long. On a scale of 1 to 10, the burning this time was about a 7 or less and only lasted about the first 10 minutes of the treatment.
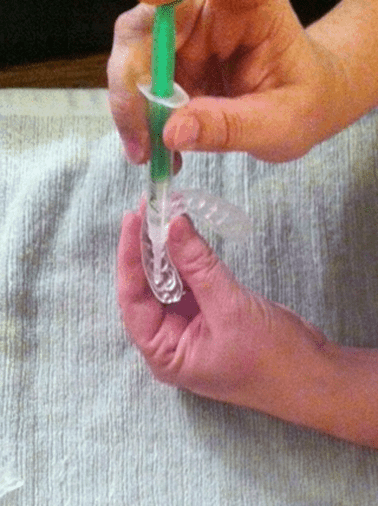
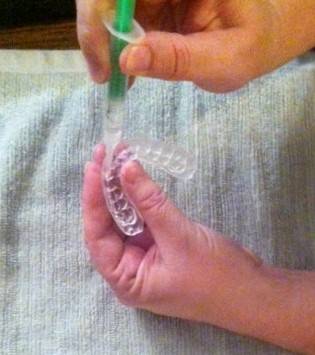
Step 2: Preparing Trays To prepare the trays, wash and dry hands thoroughly first. If this is your first use of one of the whitening gel syringes, either twist or clip the tip off of syringe. Gently, but firmly and steadily, press the syringe so that a ribbon of clear gel is placed on the inside of the teeth tray. It should be approximately midpoint along the sides of the liner. The gel is applied along where the outer teeth surface would meet the tray. As a rule of thumb, there should be approximately a bead of gel on each tooth tray cavity. This uses about ½ ml of gel per tray.
Step 3: Inserting Trays and Whitening Process
Once gel has been applied, the trays are ready to be inserted into the mouth and onto the teeth. Try to place the tray far enough into the mouth so that you are pressing it in a forward motion onto your teeth as opposed to dragging it down onto your teeth.
Some excess gel may ooze out of the tops of the trays along your gum line. Wipe away to lessen sensitivity. Repeat with other tray. Both trays may be worn at once.
The whitening process may be done by leaving the trays on the teeth for a period of between 20 minutes to 3 hours, depending on your tolerance and need for whitening. You may go about your business and normal activities while wearing the trays, but don’t sleep in them. I usually spent the time watching a good movie or reading a book and completely forgot they were in my mouth.
When done, brush teeth with water and rinse if desired. Rinse and dry teeth trays before storing in case. Gels should be stored in a cool, dry place and away from direct sunlight. Refrigeration will improve the shelf life of gels to almost 2 years,
Final Thoughts and Recommendation for Smile Brilliant
Having tried other OTC whitening products, I was skeptical of the Smile Brilliant product’s effectiveness. However, I was pleasantly surprised. After the second treatment I started to see a real whitening difference. After 8 treatments, the whitening was obvious and I was very pleased. I am nothing but all smiles!
PROS
- The tray creation process was not complicated and was actually interesting. The instructions that come in the tray creation kit are very informative and easy to follow.
- The customer service provided by Smile Brilliant was also exceptional. I had a problem with the mail service delivering my impressions (lost in the mail!). The Smile Brilliant representative promptly sent me a new set of impression trays and followed up thoroughly to ensure that I received my trays.
- The whitening process is simple and quick to get started.
- Being able to put the whitening trays in and continue normal activities is a bonus.
- Whitening results are much better and quicker than other OTC whitening treatments.
CONS
- The only negative comment I can make is related to the gum sensitivity. I had slightly sensitive gums before beginning the whitening process. The sensitivity caused from whitening after flossing was almost enough to cause me to stop the treatments. However, by not flossing prior to whitening I was able to continue with minimal discomfort and good results. And, there are no lingering effects. So, even this negative was overcome.
Few people are aware that most of the features that whitening strips are glorified for are in fact myths. Let me bust seven teeth whitening myths that I came to understand during this experiment.g
1) DIY Teeth Whitening Harms Your Enamel
Many people wrongly believe that the only way that teeth whitening works is by melting off the top layer of one’s enamel. Teeth whitening gel uses a stain removal process that focuses mainly on the dirt and stain particles in your teeth. Smile Brilliant is a safe way to whiten teeth without harming the enamel and is prescribed for stain-free teeth.
2) Teeth Whitening has Instant Results
You cannot expect instant removal of stains that have formed over several years. The effectiveness of the treatment varies depending on the types of stains in question. While some patients will experience results in 4-7 days, some require more time and may take up to 14 days to see the results of using Smile Brilliant.
3) Teeth Whitening has Permanent Results
Many think of teeth whitening as a permanent solution to discolored teeth. Nearly every beverage and food is capable of staining your teeth. Therefore, keeping your teeth white is a lifelong duty. In order to keep your teeth white after using Smile Brilliant, it is recommended that you repeat the treatment after a short while.
4) It Is not as Effective as Professional Whitening
Studies show that home teeth whitening solutions are similar and in some cases more effective when compared to laser whitening. The high cost of laser whitening makes Smile Brilliant a more cost efficient and effective option.
5) Whitening Trays are Painful to Wear
With Smile Brilliant, you are able to get a tray that fits your teeth perfectly. I made a mold of my teeth and received a 100% fitting tray. Smile Brilliant trays have flexible plastic and are comfortable. I was able to wear my trays for more than one hour without experiencing any discomfort.
6) Strips are Better than Trays and Gel
Whitening strips works by enamel removal, a pretty painful procedure. Smile Brilliant applies a safe and painless stain removal method to whiten your teeth. 7) Teeth Whiteners Make Teeth White The most common misconception is that teeth whiteners make your teeth white. The truth is, whiteners such as Smile Brilliant deal with removing stains so that your teeth achieve their natural color. Therefore, if your teeth are naturally yellow or brown, that is what the whitener will bring out.
The Process
- Make your molds – In order for the carbamide peroxide gel to be absorbed in every corner of your teeth, you need to make molds of your teeth. Use some dough and bite into it.
- Send them in – There is a pre-paid envelope in your package, use it to mail your molds.
- Get them back – Custom-fitted trays will be created and mailed back to you within 3-5 days
- Add gel – Apply a small strip of the carbamide gel in your molds
- Apply – Wear the molds for 15 minutes to 3 hours a session I could comfortably wear the molds for 1 and a half hours a session
- Repeat!
The Smile Brilliant Product
The Smile Brilliant package comes to you in a sturdy box containing the “Tray Creation Kit”. Included in the kit are:
- 3 catalyst pastes
- 3 base pastes
- 2 impression trays
- 3 syringes of desensitizing gel
- 3 syringes of whitening gel
- Instruction guides (tray creation, desensitizing gel usage, whitening gel usage)
- Return card and postage-paid envelope
Whatever your reason for wanting to have a sweet smile, I would recommend Smile Brilliant to anyone. With its ease of use, excellent customer service, and reasonable price, it’s definitely a teeth whitening product to try. Now you can check that off your wedding timeline and get to your next to-do like looking for a wedding venue.
If you’re searching for Smile Brilliant Coupons or a promo codes, then stop. Smile Brilliant stopped accepting coupons back in 2015 when they realized that their product sells on it’s own and they don’t need to discount it to encourage people to buy. If anybody claims that they have any it’s probably outdated.
In the myth busting section, you mentioned “Whitening strips works by enamel removal, a pretty painful procedure” when comparing this gel to strips.
Unless you are referring to strips I haven’t heard of, this is completely wrong.
Crest whitening strips work in the exact same fashion as this gel… They just don’t have custom fitted trays.