• Submit Photos
  • Featured Badge
  • Contributors
  • Become a Wedding Blogger
  • Advertise

The Inspired Bride

Wedding inspiration resources & ideas to help you plan your wedding

  • Home
  • Inspiration
    • Season
      • Summer
      • Spring
      • Fall
      • Winter
    • Styles
      • Rustic
      • Casual
      • Modern
      • Traditional
      • DIY
      • Vintage
      • Whimsical
      • Glamour
      • Luxury
      • Bohemian
    • Wedding
      • Real Weddings
    • Engagement
    • Styled Shoot
    • Bridal Shoot
    • Bridal Shower
    • Honeymoon
    • Bachelorette / Bachelor Party
    • Trash the Dress
  • Vendors
  • Photographers
  • Planning
    • Tips and Tricks
    • DIY Projects
    • Inspiration Boards
    • Planning Tools
    • Resources
  • Destination Weddings
  • Popular
  • More..
    • Accessories
    • Big Ideas, Tiny Budget
    • Bouquets and Flowers
    • Bridal Showers
    • Bridesmaids
    • Cakes
    • DIY
    • Ceremony
    • Color Palettes
    • Decorations
    • Favors
    • For the Guys
    • Giveaways
    • Groomsmen
    • Guest Posts
    • Honeymoon
    • Inspiration Shoots
    • Invitations & Stationery
    • Just for Fun
    • News Blips
    • Personal Touches
    • Real Engagements
    • Registry
    • Rings
    • Services and Vendors
    • Sponsored Posts
    • Trending Now…
    • Wedding 101
    • Wedding Dresses

Do It Yourself Project: Desert Bloom Boutonniere

by Niki - Inspired Bride 2 Comments

DIY Week

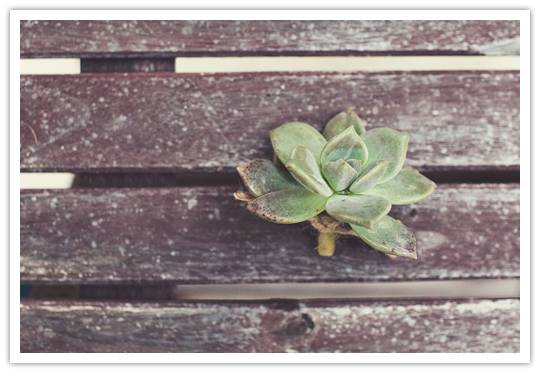
It’s time for yet another lovely boutonniere from Leigh Anne of the Floral Lab featuring photos from Jackie Wonders. As many of you know by now, I am a huge succulent lover and absolutely adore weddings that find a way to incorporate them in unique ways. A succulent boutonniere is a sweet way to do so, and you’ll be excited to see how simple it is!

• • ♥ • •
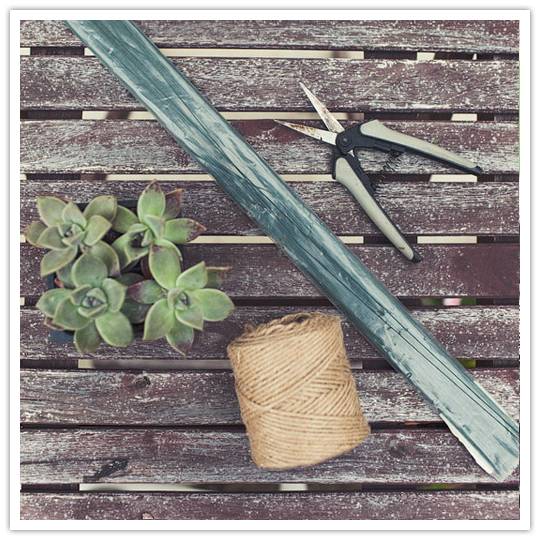
WHAT YOU’LL NEED

Succulent
Floral Shears
Boutonniere Pin
Twine
Floral Tape (Optional)
Floral Wire (Optional)

Remove the succulent from its packaging and remove the dirt and root system so you’re left with a clean stem. Clean off any dirt that may be left on the succulent top. If you feel you need to lengthen the stem, you can take the optional step to wire it (see directions below). Tie a length of twine around the succulent stem and knot it, then finish with a boutonniere pin.
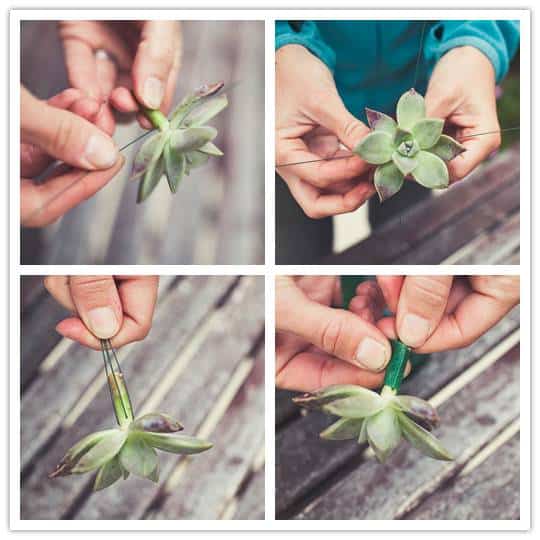
Wiring: Blossoms like orchids need to be wired for added stem support. Our succulent did not need to be wired, but a simple demonstration has been included to show you how to wire for a boutonniere or for inclusion in a bouquet. Blossoms like orchids need to be wired for added stem support. Our succulent did not need to be wired, but a simple demonstration has been included to show you how to wire for a boutonniere or for inclusion in a bouquet. Begin by removing a single blossom from its stem. Poke a soft gauge floral wire straight through the base of the stem, as pictured. For added support, poke another soft gauge floral wire straight through the base, forming an X, as pictured. Bend the wire to a 90° angle, then wrap the stem and wire with floral tape to desired length and cut wires. Each individual blossom will now have its own stem.

Storing and Attaching Your Boutonniere: If you have a refrigerator without ANY fruit or vegetables in it, you can store your boutonniere in it for up to two days. Produce gives off an enzyme that will wilt your flowers if stored together. Otherwise, it’s best to make your boutonniere the night before or day of and keep it in a cool place. When it comes time to pin on the boutonniere, it’s best to have someone other than yourself to pin in on you. Place the boutonniere on the center of your left lapel. From the back of the lapel, insert your boutonniere pin, cross over the stem, and re-insert into the fabric.

Images from Jackie Wonders. Project by Leigh Anne Landman of the Floral Lab.

Filed Under: Bouquets and Flowers, Do It Yourself, For the Guys

The opinions expressed here by The Inspired Bride editors are their own, not those of The Inspired Bride or TWBN.

Comments

  1. Dognbird says

    What a charming little DIY project, love the finished boutonniere.

    Reply
  2. Beth Kelley says

    I’m gonna give it a shot as soon as the snow melt so that I can practice. If it works well, it is in.

    Reply

Leave a Reply Cancel reply

Your email address will not be published. Required fields are marked *

This site uses Akismet to reduce spam. Learn how your comment data is processed.

Popular

  • What Can Your Flower Girl Carry Down the Aisle Instead of Flowers?
  • 10 Stunning Tea Length Wedding Dresses
  • Wedding Date Superstitions You Need to Know Wedding Date Superstitions You Need to Know
  • So you love the color gold and you know this will be one of your wedding colors but you’re not sure about the others. We want to share some gold color pallets along with some tips on your wedding color palette especially for choosing a great companion color for gold. Wedding Color Palette: Gold
  • How to Plan a Potluck Wedding
  • Archive
  • Popular
  • About
  • Advertise
  • Badge
  • Contact

All Content Copyright © 2009-2023. The Inspired Bride unless otherwise noted or credited.
Please refer to our Content Usage Guidelines if you wish to use any of the content on this website.
In full disclosure, this post may contains links to help support my site.
Terms of Service | Privacy Policy | DMCA | Contact