• Submit Photos
  • Featured Badge
  • Contributors
  • Become a Wedding Blogger
  • Advertise

The Inspired Bride

Wedding inspiration resources & ideas to help you plan your wedding

  • Facebook
  • Instagram
  • Pinterest
  • RSS
  • Twitter
  • Home
  • Inspiration
    • Season
      • Summer
      • Spring
      • Fall
      • Winter
    • Styles
      • Rustic
      • Casual
      • Modern
      • Traditional
      • DIY
      • Vintage
      • Whimsical
      • Glamour
      • Luxury
      • Bohemian
    • Wedding
      • Real Weddings
    • Engagement
    • Styled Shoot
    • Bridal Shoot
    • Bridal Shower
    • Honeymoon
    • Bachelorette / Bachelor Party
    • Trash the Dress
  • Vendors
  • Photographers
  • Planning
    • Tips and Tricks
    • DIY Projects
    • Inspiration Boards
    • Planning Tools
    • Resources
  • Destination Weddings
  • Popular
  • More..
    • Accessories
    • Big Ideas, Tiny Budget
    • Bouquets and Flowers
    • Bridal Showers
    • Bridesmaids
    • Cakes
    • DIY
    • Ceremony
    • Color Palettes
    • Decorations
    • Favors
    • For the Guys
    • Giveaways
    • Groomsmen
    • Guest Posts
    • Honeymoon
    • Inspiration Shoots
    • Invitations & Stationery
    • Just for Fun
    • News Blips
    • Personal Touches
    • Real Engagements
    • Registry
    • Rings
    • Services and Vendors
    • Sponsored Posts
    • Trending Now…
    • Wedding 101
    • Wedding Dresses

Building a Manzanita Wedding Centerpiece [DIY]

by Carla Leave a Comment

manzanita wedding-centerpiece

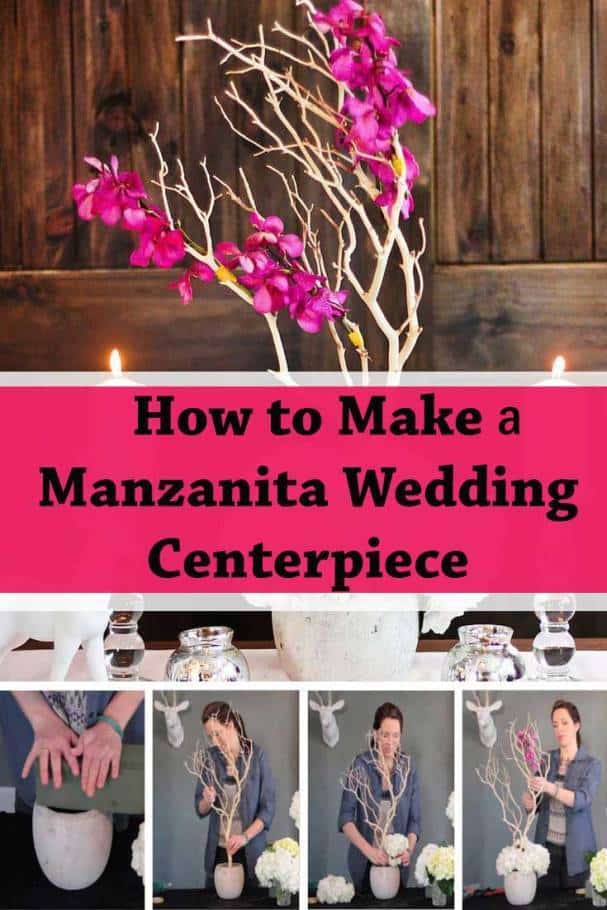
Manzanita branches embroidered with fascinating orchids and surrounded by lovely hydrangeas around the base is a stunning and captivating wedding centerpiece. This is an excellent feature in a rustic-themed wedding by Amy McCord from Flower Moxie. This homemade centerpiece is super easy and takes a bit of your time to prepare.

You need:

  1. Orchids
  2. hydrangea
  3. 18-24′ sandblasted Manzanita branches
  4. floral foam
  5. gold floral tape
  6. vase

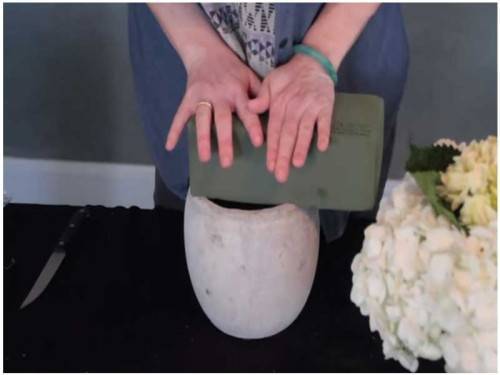
In this project, you absolutely need a solid container or vase in order to keep the Manzanita stable. So make sure your base is tough and sturdy. Then, grab the floral foam. Do not get it wet yet. You need to insert the foam into the vase. In this tutorial, a circular vase is used so in order to fit the foam in, it is pressed against the mouth to determine the how much of it is going to be used. After that, cut the excess foam. Again, position the foam at the vase’s mouth and ram it in.
diy manzanita centerpiece

Step 1:Insert the floral foam into the vase.

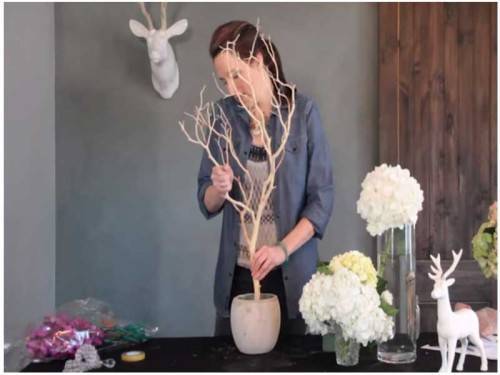
Next, pour a pitcher of water into the foam. Grab the Manzanita branches and position it at the center of the foam. Then, gradually drive it straight down. A small tip: Do not stab the stem a few times to the foam because the more times you do it, the more you do damage to the foam.
diy manzanita centerpiece

Step 2:Grab the Manzanita branches and drive it through the foam.

The hydrangeas hide the foam and the interior of the vase. Moreover, it is used to maintain the stability of the Manzanita. Cut the stem of the flower at angle so you can easily drive it through the foam. Surround the base of the Manzanita with hydrangeas. Make sure the foam has enough water because once this type of blossom does not get enough, they easily withered which you do not like to happen before your event begins. Bear in mind to fill up the foam a few times.

diy manzanita centerpiece

Step 3:Surround the base with hydrangeas.

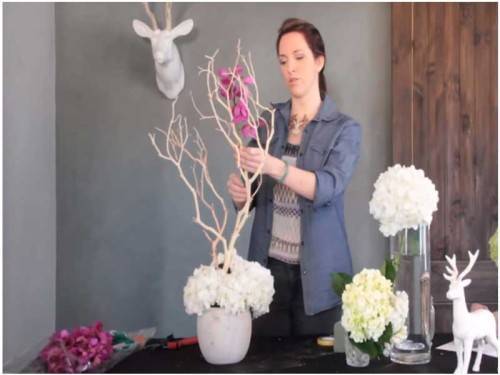
You can decorate your branches with gems or crystals. Another beautiful option is orchid. Oftentimes, when you buy orchids from a local store they come with water source or a small floral foam at the bottom of the stem. Keep them attached before you set them up on the table. Use floral tape to secure the orchid on the branches. In this tutorial, gold floral tape is utilized as it looks like a magnificent attribute in your centerpiece.
diy manzanita centerpiece

Step 4:Decorate the branches with stunning orchids.

If you are contented with the arrangement of the orchids on the branches, then the finished product is ready to be admired. Several minutes before the receptions starts, cut the water source. You can also add LED lights and crystals on the branches. Ensure not to overdo it. Make it simple.
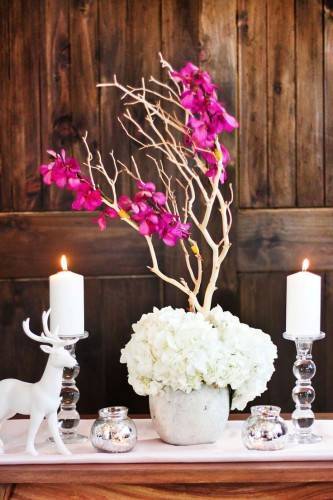
diy manzanita centerpiece

Step 5:Place the glamorous finished centerpiece on the table.

Watch How it is Done

Save the Steps Using this Bookmarklet

diy-wedding-centerpiece


Filed Under: Do It Yourself

The opinions expressed here by The Inspired Bride editors are their own, not those of The Inspired Bride or TWBN.

Leave a Reply Cancel reply

Your email address will not be published. Required fields are marked *

This site uses Akismet to reduce spam. Learn how your comment data is processed.

Popular

  • 8 Simple Wedding Desserts You Can Make Yourself
  • What Can Your Flower Girl Carry Down the Aisle Instead of Flowers?
  • Wedding Date Superstitions You Need to Know Wedding Date Superstitions You Need to Know
  • Funny Wedding Vows
  • 10 Stunning Tea Length Wedding Dresses
  • Archive
  • Popular
  • About
  • Advertise
  • Badge
  • Contact

All Content Copyright © 2009-2023. The Inspired Bride unless otherwise noted or credited.
Please refer to our Content Usage Guidelines if you wish to use any of the content on this website.
In full disclosure, this post may contains links to help support my site.
Terms of Service | Privacy Policy | DMCA | Contact