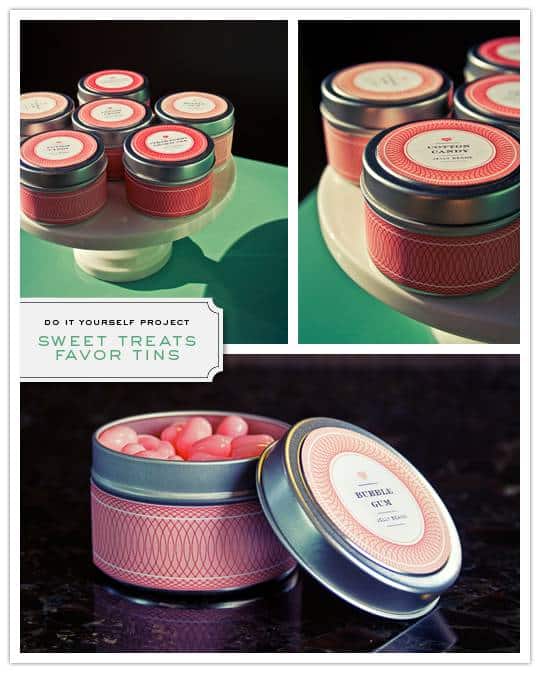
I love this project, and I’m super excited to share it with you. If you’re interested in giving your guests options to satisfy their sweet tooth, but don’t want to have to coordinate a candy buffet, use this as a great way to get an assortment of the same candy and identify them accordingly. In this example, I have three flavors of pink Jelly Belly jelly beans, and have used the template to make three shades of the same color to help identify which flavor is which.
As a note before we begin, it is super important that you ensure that your metal tin is food safe when you make these. Unless you plan on using these to hold something else that your guests will not be putting in their mouths, you need to check with your supplier that the container you choose is food safe certified. If it is, it will most likely say so on the product page on the suppliers’ website, but if you have questions, you should contact the company to make sure.

What You Will Need:
4-ounce Food Safe Metal Tins (should be approximately 2.5″ in diameter like these from SKS Bottle)
Our Tin Cover Label PDF (available here)
Our Tin Base Wrap PDF (available here)
Good Quality Printer Paper
Double Stick Tape
Scissors
Rotary Trimmer and / or 2.25″ Circle Punch (optional)
Assorted Candies of Your Choice
STEP ONE: Open both PDFs in a program that will allow you to edit it – I recommend either Illustrator or Photoshop. Add whatever text you would like to the cover label to customize it to your liking (the typefaces I used are Engravers LH Boldface and Sackers Gothic Medium). If you want to shift the color of the labels in Illustrator, click on the individual elements separately (the hairline stroke detail and the clipping mask background) and change the swatch manually – note that both are actually the same color, but the design element is set to display with the Multiply effect. If you have imported the PDF into Photoshop, you can adjust the color through the Image » Adjustments » Hue/Saturation tool and move the sliders to your liking.
STEP TWO: After prepping your files, print them. Trim each label and wrap as precisely as you can – a rotary trimmer is a great tool to have on the wraps. If you’re worried about cutting the circles out, I’ve seen 2.25″ circle punches available in craft shops – I’m sure there are quite a few places that sell them online, too.
STEP THREE: Before applying any of your labels to your tins, clean each of them thoroughly. If you have pets in the house, assemble your favors in an area that you can block off while putting them together so no pet hair makes its way in. It seems obvious, but you know – it’s got to be said. Particularly since my kitties like jelly beans. And cupcake icing. And chocolate chips. (They inherited their mommy’s sweet tooth.)
STEP FOUR: Turn the cover label over and apply double stick tape to the back side. I found that the finished piece looked best when I avoided letting pieces overlap but still covered it thoroughly – particularly at the edges. After applying the tape, turn the label over and center it visually within the surface of the tin cover. Press firmly down to secure the label in place.
STEP FIVE: Turn the wrap label over and apply double stick tape to the back side. After applying the tape, turn the wrap label over and vertically center the left edge of the label on the base of the tin. Continue to wrap the label around the base of the tin, keeping it as straight as possible, until both ends meet. In most cases, the label will have a little overage – you can overlap the ends or trim the extra depending on your preference. Press firmly down on the wrap to secure in place.
STEP SIX: Fill each tin with the candy of your choice. For the record, my four ounce tins did hold almost exactly four ounces of Jelly Belly jelly beans, though that could change depending on the candy you use if you pick something different.
That’s it! You’re done. It’s that easy – even your not-so-crafty buddies will be able to manage this, so call everyone up, rent a movie, and get that production line going!
These are great, thank you for sharing the tin label template 🙂
How darling! I’m not planning a wedding, but excited about your DIY week nevertheless! Thanks for the inspiration!
I think this is a great idea for a bridal shower favor! Thanks.
These are super cute!
These are really well designed, thank you so much
merci beaucoup pour ce partage , bonne continuation
Thank you so much
it’s perfect!
That is such a fantastic idea – thanks!
Thank you for taking the time to share these lovely labels- I’m using them for part of my kid’s teacher’s Christmas gifts. 🙂