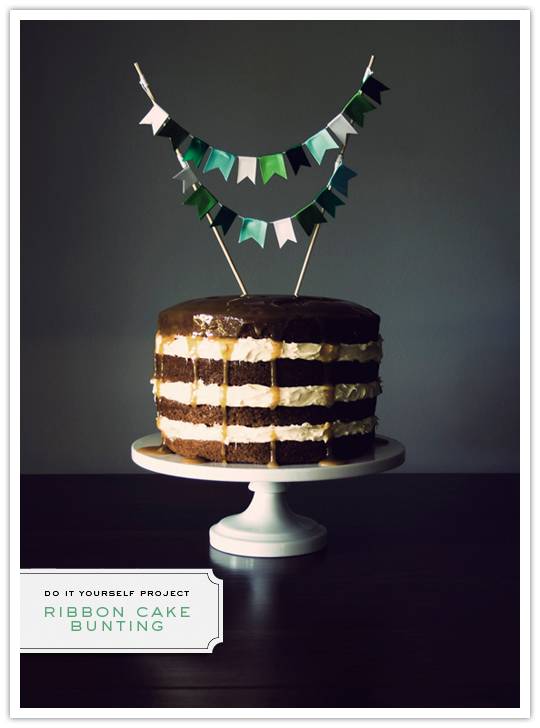
Today we get to have a DIY break! Everyone knows that bunting is everywhere in events, and now it’s making its way into dessert presentations. My good friend Shauna (of Shauna Younge Dessert Tables) and I thought it was high time we put out a cake bunting do it yourself project, so with the help of her impeccable dessert styling skills, this incredibly simple to replicate project was whipped up! Enjoy!
• • ♥ • •
What You’ll Need:
Scissors
Double Stick Tape
Ribbon in Various Colors, 1” and 2” wide
White Cotton String
Bamboo Barbeque Skewers (Available at Target or your local grocery store)
Wrap a piece of double stick tape around one of your bamboo skewers, about an inch or two from the top (the exact positioning is ultimately your preference). Leaving an extra 1.5” loose, begin to wrap your string around the skewer until it has covered all of the tape neatly. Do NOT cut the string from its ball or spool. Tie the excess 1.5” with the string portion attached to the ball or spool into a double knot to hold the string in place.

Set the skewer on a table, and angle it as you wish for it to be displayed on your cake. Set out a second skewer, also tilted at a mirrored version of the same angle, as far away as you plan for them to be on the cake. Roll out string so that it bridges the two skewers with some slack and forms a soft curve. Repeat the attachment process from step one on the second skewer.
Cut 2” lengths of each color of your ribbon. Set aside in ordered piles so you can work quickly. To attach each flag, line each piece of ribbon with double stick tape. Center the ribbon length vertically along the ribbon, then fold it over on itself. Press down to secure, ensuring the cotton string is flush with the fold. Cut a shallow “V” shape into the ribbon for a banner look. If you prefer the squared off look, this step can be optional. Continue to attach flags across the length of string. Keep each flag as evenly spaced as possible. Attach additional flag strings as desired.
Insert the bunting into the cake. Do not pull out and reposition – it will make the skewer’s hole too big in some cakes and the skewers may begin to slouch, warping the presentation.
Cuuuuuuuute.
Cuuuuuuuute.
Oh this is too adorable! I want this sweet decor on every cake from now on! 🙂
Oh this is too adorable! I want this sweet decor on every cake from now on! 🙂
perfect perfect perfect!! can’t wait to try this!
perfect perfect perfect!! can’t wait to try this!
I LOVE this!! I’m going to head to my local craft store this very instant!
I LOVE this!! I’m going to head to my local craft store this very instant!
I love the bunting, but I am seriously in love with that cake! You are making me so hungry!!!!
I love the bunting, but I am seriously in love with that cake! You are making me so hungry!!!!
This is such a great idea! So adorable and cute:-)
This is such a great idea! So adorable and cute:-)
I thought the bunting part was the layers! Now I get it. But I’d love to know how to make THAT cake. What’s in the creamy, middle layers?
cute bunting, but that cake looks amazing. i need that recipe!